 |
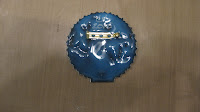
| birthday card with pin |
The girls asked me to make something with the Domino's gift image. It's such a cute image I was happy to oblige.
Say hello to Domino, isn't she a good doggie! If you love her as much as I do you can get the digital image here.
 |
| inside of card with pin attached to cardstock popped up on dimensionals |
So let's say you're strapped for cash or you're just cheap and you need a birthday card and present for your bestie best friend. She knows you make cards, she probably loves everything you make and will be thrilled if you make her a present. So how about a pin, you know costume jewelry. Isn't that a dumb name, it's not a costume, that's for halloween. This pin is something she can wear all year. Of course you could make a pin for halloween, just choose the appropriate image and follow the general idea of the instructions
So here's a lesson on how to make a pin using the S2G digi image "Domino's Gift". You can click on any of the pictures and be able to see an enlarged image, but I didn't do a very good job of focusing.
What you need
A small piece of black (or any color you like) card stock for the backing, this adds some stability and strength to the pin.
A jewelry pin, you can pick these up in most craft stores. They come in different sizes and finishes. I pick them up in small sizes because I usually make small pins. The finish doesn't matter to me.
Coloring and decorative mediums. You can use pencils or markers. I’ve made these with copics as well as Stampin’ Up markers. Colored pencils will work. You may like to put sparkles on the pin which gives a nice effect (be careful a little goes a long way). Today I am going to use some stickles on the wreath/border aroud this image. (This image would be really cute for a Christmas present). These directions include the numbers of the markers I used for this particular pin, but you can use any colors for yours. If you're not sure how to substitute colors, pick colors that you like or pull colors from the designer papers you will be using to make the card. Have a light and dard shade of each color, use the light color as the base color and shade with the darker one.
Glossy Accents (Ranger product) or Crystal Effects (from Stampin’ Up). I’ve used both products and they work exactly the same. I’ve never used UTEE but I’m told it works too
A plastic work mat or a piece of waxed paper is helpful – especially if you like the finish on your work table.
Time - Parts of the card require drying time, you can't rush this. So don't wait to the last minute. You can make this in a night, but you will need a few hours.
Let’s get started.
When coloring it’s best to start with your lightest colors. For this pin the background is B000 Pale Porcelain Blue. Then color around the dog’s edges with B00 Frost Blue. I’ve gone over that edge a couple times to give it some definition.
Color Domino with Y21 Buttercup Yellow, shade his left side with a thin line of Y26 Mustard. Go over the area where the colors meet this will provide a shaded look and eliminate the look of an outline. To make it look like a curly haired dog use a fine pointed marker to make some squiggley lines on his fur. For this doggie I used Stampin’ Up Mustard. Repeat this color scheme on a second face – this is the one that will show. The second face will be placed over the base one and will give it a little extra dimension.
Color the present with B01 Mint Blue and shade the lines with B02 Robin’s Egg Blue. Repeat this on the second image, again this is the one that will show.
 |
| affix the image to a slightly larger piece of cardstock |
If you like to sign your work, now would be a good time to do it. Flip over the base image, keep in mind that you will be adding a pin to the back and sign it in a place that won't be covered by the pin.
Place stickles on the large white dots on the wreath. I used turquoise stickles, I like the way they look put they don’t stand out a lot so think about that when picking the color you will use. Now put this on the side and let it dry. Stickles WILL make a mess if they get a chance, so let it dry. Use the time to make the card you’re going to give with the pin.
Once the stickles are dry you are ready to put on the second face and gift bag. This is when you will want to be using a plastic work surface or waxed paper. Go find the face and bag (did you put them where you could find them or did you let them take a walk, if they're walking now would be a time those extra prints would come in handy) Starting with the face and gift bag spaces cover the image with a thin coat of Glossy Accents. Put the cut out pieces on top of their base images and cover the second image with Glossy Accents. There will be a just a little space and even though it's very thin, that little space does add something positive to the overall appearance. Use the tip of the bottle to spread the liquid around. Continue covering with the Glossy Accents until the entire surface is covered. This would be the time to put on the clear sparkle, remember if you do use them, use them sparingly. If the Glossy Accents went over the edges when it is dry you’ll be able to gently pop it off of the waxed paper or plastic sheet without damage to the pin or your table. Again you will need to let it dry, it takes at least an hour, depending on how thick you put on the Glossy Accents. If you already made the card, now you could make a little box for it, or a gift bag.
When the front is dry flip it over and coat the back with Glossy Accents. Place the pin on top of the Glossy Accents, in the center about an inch from the top. Allow to dry. In this photo the Glossy Accents have just been applied, they'll even out a little as it sits and they will dry clear.
Once it's dry your pin is ready to wear or give away.
I hope these directions were clear, please let me know if something didn't make sense.
Here's the deets:
Image - Shirley's 2 Girls "Domino's Gift" digi image
Ink - HP printer
Paper - for the card base SU kraft; scrap of black card stock; Georgia Pacific for the image; dp DCWV the Pet's Stack
Miscellaneous - Copics; jewelry pin; Crystal Effects; stickles; May's ribbon; TCP twine; charm; Michael's rhinestone stickers
Thanks for visiting, I hope you'll come back again.


Wow Chris, what an awesome project! I love this idea.
ReplyDeleteTerrific-love the tutorial!!! (Love your commentary, too!) And, yup, I'm a huge Domino fan-a girl, you say---funny, my Domino is a boy!
ReplyDeleteWhat a great idea for a gift! Love the card and the matching pin too! Too cute!!!
ReplyDeletePerfect tutorial! Thanks for sharing your ideas.
ReplyDeleteThis is adorable..
ReplyDeleteHi Chris, love your tutorial, FABULOUS girl.
ReplyDeletegreat tutorial, Miss Chris!! what a fun pin!! Love it!!
ReplyDeletejennik